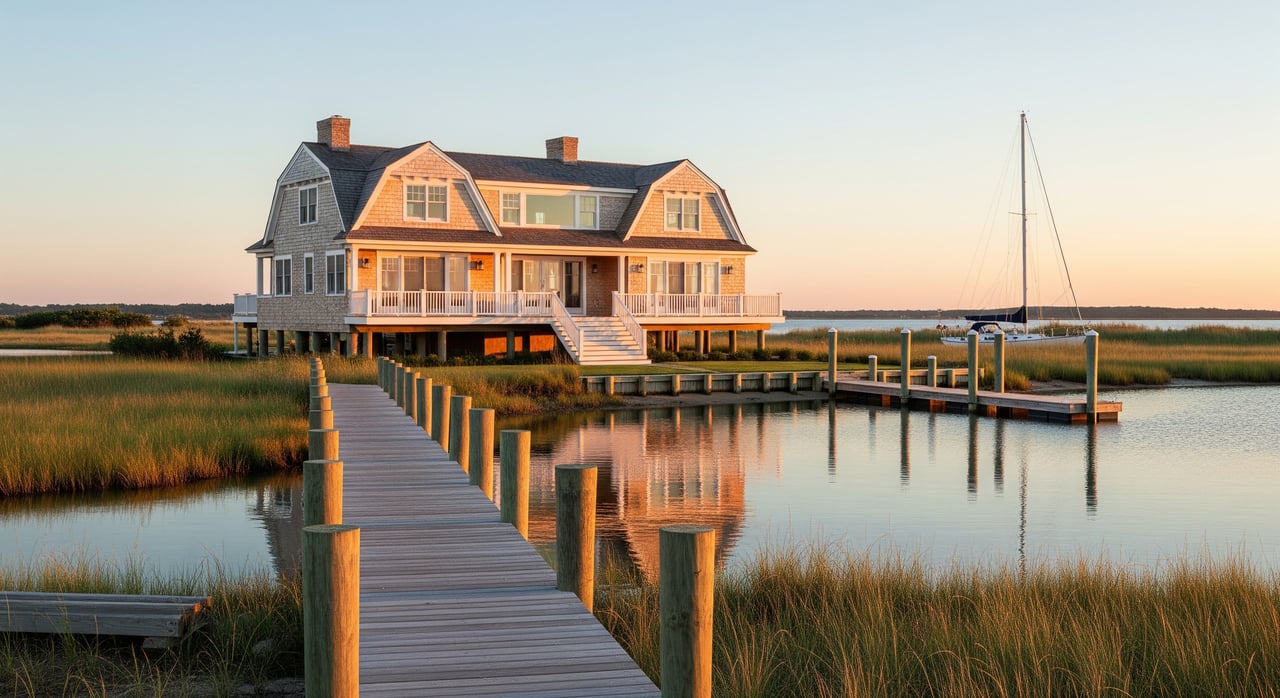
Packing up after a great season in Strathmere? Winter at the Jersey Shore can be tough on empty homes, especially on a barrier island. You want to return in spring to a home that’s dry, safe, and ready to enjoy. This guide gives you a clear, step-by-step checklist tailored to Strathmere’s coastal risks so you can protect your investment and your peace of mind. Let’s dive in.
Why Strathmere homes need a plan
Strathmere sits on a barrier island, which means your home faces coastal flooding, storm surge, strong nor’easters, wind-driven rain, salt spray, and occasional hard freezes. If a home sits vacant, even a small leak or heating failure can turn into a big problem before anyone notices.
Winter storms can arrive from late fall through winter, and short cold snaps are enough to freeze exposed plumbing. Before you close up, review flood maps and insurance needs, and check local guidance from Cape May County and Upper Township for storm advisories and any sandbag or access information.
If you plan any work near dunes or sand, review New Jersey coastal rules first. Many dune or shoreline activities require permits. Utility providers can also advise on safe shutoffs and reconnection steps for electricity, water, and propane.
Choose your plumbing approach
Your top goals are to prevent frozen pipes and catch leaks early. You have two main strategies:
Strategy A: Keep heat on with live water
- Set the interior temperature at a safe level. Many insurers recommend 55°F or higher. Confirm your policy.
- Use a smart thermostat so you can monitor and adjust remotely.
- Arrange periodic checks in person to confirm the heat is working and look for leaks.
Pros: Simpler to reopen, less risk of appliance issues. Cons: Ongoing energy use and risk if the heating system fails.
Strategy B: Fully winterize and shut water off
- Shut off the main water supply and clearly label the valve.
- Drain the plumbing system. A professional compressed‑air blowout is recommended to fully clear lines.
- Add non‑toxic RV antifreeze to traps and fixtures (toilets, sinks, tubs) per manufacturer instructions.
Pros: Removes standing water that can freeze. Cons: Best done by a licensed plumber to avoid missed lines or damage.
Plumbing steps to add to your checklist
- Drain and disconnect exterior hoses, outdoor showers, irrigation, and pool lines per installer guidance.
- Set the water heater to vacation mode or drain it per the manual. When in doubt, call a pro.
- Shut supply valves to the washing machine, dishwasher, and icemaker. Drain lines and prop appliance doors open so interiors dry.
- Insulate exposed pipes in crawl spaces and exterior walls. Use heat tape on vulnerable exterior runs where appropriate and safe.
Heat and HVAC readiness
- Service your heating system before you leave. Replace filters, test the furnace or boiler, and check venting and flues. Salt air can accelerate corrosion, so note any rust and schedule repairs.
- If you maintain heat, keep it at a safe low setting and monitor with a smart thermostat.
- If you turn heat off, confirm your plumbing is fully winterized and follow the boiler or system manufacturer’s guidance.
- For heat pumps or mini‑splits, have a contractor service the unit and protect against salt corrosion. Do not wrap condensers in plastic. Trapped moisture can cause damage. Use breathable covers only if the manufacturer allows it.
- For propane or oil, talk with your supplier about safe levels. Some tanks should not be left empty in severe cold.
Power, appliances, and generators
- Unplug non‑essential electronics to reduce fire risk and phantom power use.
- Decide how to handle the refrigerator. If you are gone for an extended period, empty, defrost, clean, and leave doors ajar. If you keep it running, arrange periodic checks.
- Add surge protection for major systems. Coastal power interruptions and surges are common during storms.
- If you have a standby generator, test the transfer switch and fuel supply and confirm safe installation.
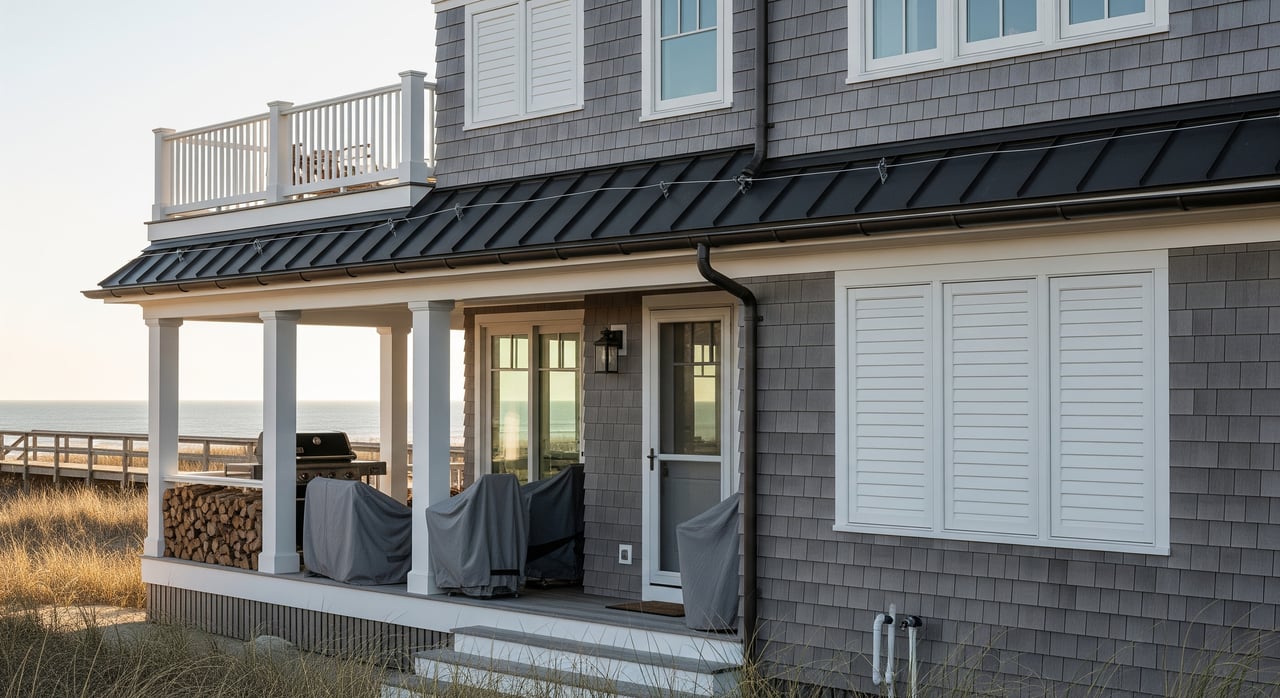
Protect the exterior envelope
- Roof and flashing: Repair loose shingles and damaged flashing. Check seals around chimneys, vents, skylights, and roof edges to stop wind‑driven rain.
- Windows and doors: Seal gaps with quality exterior or marine‑grade caulk. Check weatherstripping and storm shutters if installed.
- Decks and stairs: Tighten fasteners, clear debris, and store or secure furniture, grills, and planters. Salt accelerates corrosion, so consider stainless or coated hardware when replacing.
- Drainage: Clear gutters and downspouts so water moves away from the foundation. Keep nearby storm drains free of debris.
- Dunes and shoreline: Do not move sand or attempt dune work without checking state and local rules. Plan long‑term erosion strategies with qualified coastal professionals if your property is in a high‑risk area.
Control moisture, pests, and septic
- Lower indoor humidity before closing up. Run a dehumidifier to bring levels below about 50 percent.
- Ventilate crawl spaces and attics as appropriate. Ensure crawl space vapor barriers are intact and seal plumbing penetrations.
- Remove all perishable food and clean kitchen surfaces and drains. If safe, prop cabinet doors open under sinks for air circulation.
- Seal entry points, trim vegetation near the foundation, secure pet food and bird seed, and consider traps or a professional treatment to deter rodents and insects.
- If you use a septic system, pump and inspect per the recommended schedule before vacancy. Avoid harsh chemicals when you return.
Insurance and documentation
- Review your policy’s vacancy clauses. Some insurers require you to keep heat on, notify them of long vacancies, or take specific winterization steps.
- Consider flood insurance through the National Flood Insurance Program or a private policy if you are in a flood zone. Standard homeowners insurance usually excludes flood damage.
- Document your property’s condition. Take dated photos and video, save receipts for maintenance, and keep an inventory of valuables.
- Share emergency contacts and access information with your mortgage servicer if required and with a trusted local contact or property manager.
Smart monitoring and local check‑ins
- Add sensors where it matters: temperature sensors, water leak detectors under sinks and near water heaters, sump pump alarms, humidity monitors in crawl spaces, and power outage alerts.
- Choose systems that send text or email alerts. Cellular backup adds reliability during coastal internet or power outages.
- Schedule physical inspections weekly or biweekly in peak storm months, and always after major weather. Ask the checker to confirm the heat is working, look for water intrusion, and scan the roof and exterior.
Your pre‑winter timeline
6–8 weeks before departure
- Schedule HVAC service and filter changes.
- Book a plumber for a blowout if you plan to fully winterize.
- Inspect the roof and flashing and complete repairs.
- Review flood insurance and vacancy terms with your insurer.
- Line up local help for inspections and emergency access.
2–4 weeks before departure
- Winterize irrigation and outdoor showers. Disconnect and drain hoses.
- Clear gutters and downspouts and confirm yard drainage.
- Seal exterior gaps and check weatherstripping.
- Service AC or heat pumps per the manufacturer to address salt exposure.
Final days before departure
- Shut off the main water if winterizing, or confirm heating set point and remote access.
- Turn off appliance supply valves, drain lines, and set traps with RV antifreeze if fully winterizing.
- Empty perishables, clean, run a dehumidifier, and place leak sensors.
- Share keys and entry instructions with your local contact and confirm the first inspection date.
While you are away
- Keep monitoring alerts active and test them monthly.
- Schedule and log local inspections, especially after storms.
- Maintain snow or ice services if needed to prevent ice dams.
Departure‑day checklist
- Photograph the property interior and exterior for your records.
- Confirm shut‑offs: main water off or heat set to insurer‑approved temp.
- Verify smart thermostat, leak sensors, and camera alerts are working.
- Empty trash, remove perishables, and crack fridge doors if powered down.
- Unplug non‑essential electronics and confirm surge protection on key systems.
- Secure all windows and doors, and store or anchor outdoor items.
- Leave contact and access info with a trusted neighbor or manager.
Stay storm‑ready while away
- Keep an updated emergency plan with utility shut‑off locations and contractor contacts.
- Use sandbags or temporary protective measures only in line with local rules and with realistic expectations for extreme surge.
- Consider a written agreement with a property manager that covers emergency authorization and a spending limit for urgent repairs.
A well‑winterized Strathmere home stands a much better chance of riding out nor’easters, cold snaps, and salt air without surprise damage. If you want help coordinating local pros or you are planning a spring sale, our team can line up reliable contractors and prepare a smart plan that fits your goals. Connect with the local experts at Carrie Paul to protect your shore home and position it for the season ahead.
FAQs
What temperature should I set when leaving a Strathmere shore home for winter?
- Many insurers recommend keeping the heat at 55°F or higher if you leave water on. Confirm your specific policy requirements.
Should I shut off the main water even if the heat stays on?
- Shutting off the main reduces leak risk, but if you keep water on, schedule periodic checks and install leak sensors at key points.
How often should someone inspect a vacant barrier‑island home in winter?
- Weekly or biweekly is a common cadence, with extra checks right after major storms to spot roof or water‑intrusion issues early.
Do I need flood insurance in Strathmere if I already have homeowners coverage?
- Standard homeowners policies typically exclude flood damage. Consider a separate flood policy through NFIP or a private carrier if you are in a flood zone.
Can I move sand or build up dunes on my property in Strathmere?
- Many dune and shoreline activities require state and local permits. Check New Jersey coastal rules and local guidance before doing any sand work.
Is it better to leave the fridge on or off in a vacant shore home?
- For long vacancies, empty, defrost, clean, and leave doors ajar. If you leave it running, arrange regular checks to prevent issues.
Are smart leak and temperature sensors worth it for a shore property?
- Yes. Remote alerts for temperature drops, leaks, humidity, and power outages help you act fast, which is critical when storms or freezes hit.